Choosing the right Faucet Adapter can feel like a small plumbing decision. In practice, it affects water flow, leakage, installation time, and long-term reliability. A mismatched adapter may look acceptable on the shelf, yet drip beneath the sink after several days.
Daniel O’Brian, a plumbing product expert, offers a practical reminder: “The right fitting should connect securely without forcing the threads.” That principle guides this article. You will learn how to check thread type, measure the faucet outlet, compare materials, and confirm compatibility with hoses or filters. You will also see why pressure ratings and sealing methods deserve attention.
Measure the faucet first.
Do not trust appearance alone. A chrome adapter and a stainless-steel adapter may share a similar shape, but their threads can differ. Take a close photograph, record the outlet diameter, and inspect whether the connection is male or female. These small details prevent expensive trial and error.
Still, product labels are not always perfectly clear. Some listings use inconsistent terms, and universal designs may fit only certain faucet models. That uncertainty deserves honest attention. Before purchasing, compare the manufacturer’s specifications with your measurements. Check return policies, too.
The seven tips ahead focus on practical selection rather than quick guesses. They are useful for kitchen faucets, bathroom fixtures, portable filters, and countertop appliances. A reliable Faucet Adapter should install smoothly, resist corrosion, and maintain a stable seal. It should also match your actual water-use needs, not merely look convenient in a product photo.
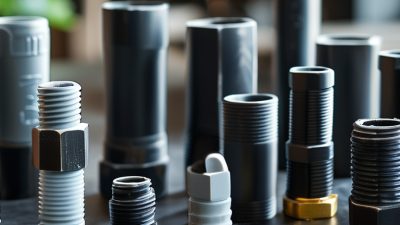
Choosing the right faucet adapter starts with identifying the connection, not the appearance. Common types include aerator adapters, diverter valves, hose-thread adapters, compression fittings, and quick-connect couplers. An aerator adapter converts a faucet outlet for a filter or portable hose. A diverter valve directs water toward a sprayer or countertop appliance. Compression fittings suit rigid tubing, while quick-connect couplers simplify temporary connections.
Tip 1: Remove the aerator and measure its threads. Male and female threads often look similar, causing avoidable leaks.
Tip 2: Check the required flow rate. The U.S. Environmental Protection Agency’s WaterSense faucet specification limits flow to 1.5 gallons per minute, about 30% below the federal 2.2-gpm standard. An adapter should not restrict flow unnecessarily. Test it with a bucket.
Tip 3: Match the adapter material to the water environment. Corrosion-resistant metal usually offers better durability than fragile plastic, but plastic can prevent thread damage.
Tip 4: Confirm whether the adapter needs a gasket. PTFE tape cannot repair a missing washer.
Tip 5: Choose a diverter when switching between a faucet and accessory matters.
Tip 6: Inspect connection standards carefully; kitchen, garden, and appliance threads are not interchangeable.
Tip 7: Install gently by hand first. Over-tightening is a common mistake, even during professional maintenance.
The U.S. Department of Energy’s plumbing efficiency guidance reinforces that flow performance depends on the complete fitting assembly, not the faucet alone.
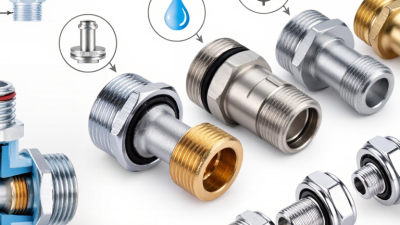
Checking thread size, shape, and faucet compatibility prevents most adapter problems. Measure the faucet opening before buying. Do not rely on appearance alone. A small mismatch can cause leaks or cross-threading.
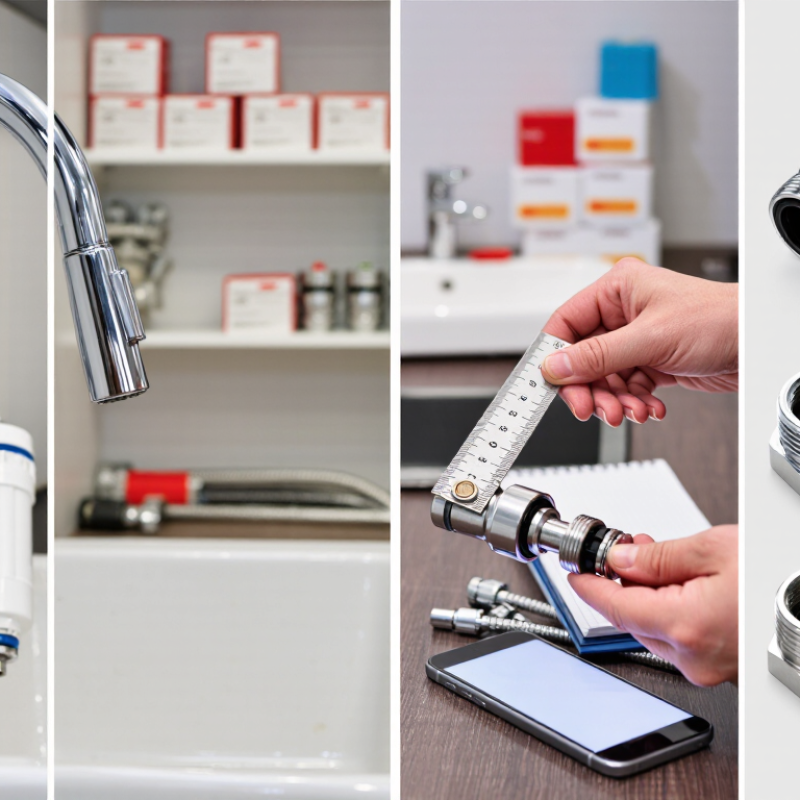
Remove the aerator and inspect the threads carefully. Some faucets have male threads outside the opening. Others have female threads inside it. Measure the diameter with a ruler, then check the thread spacing if possible. A thread gauge provides better accuracy.
I once guessed from a product photo and chose the wrong size. That mistake wasted time and damaged the seal.
Shape matters too. Round adapters suit standard aerator openings, while unusual faucet shapes may need a special connector. Check whether the faucet has a recessed outlet, pull-out head, or built-in spray function. These features can limit available space.
Confirm the adapter’s inlet and outlet sizes before installation. Also check the material, gasket position, and water-pressure rating. A rubber washer should sit flat, not twist.
Hand-tighten first. Use a wrench gently only when needed. Test the connection with a dry cloth around it. Even a slow drip deserves attention. Compatibility is more than fitting the thread.
A faucet adapter must handle more than a simple connection. It faces daily water pressure, temperature changes, and repeated tightening. Choose solid brass or corrosion-resistant stainless steel for the main body. These materials resist cracking better than thin plastic under regular household pressure. Stainless steel also suits damp kitchens and outdoor utility sinks.
Inspect the pressure rating before buying. A durable adapter should support the pressure used in your plumbing system, with a safety margin. Pressure spikes can occur when a valve closes quickly.
I once overlooked this detail, and a loose fitting began dripping after several days. The mistake was small but avoidable.
Check the threads carefully. They should feel clean, even, and compatible with the faucet outlet.
Seals deserve equal attention. EPDM and silicone can tolerate frequent temperature changes better than cheap rubber. Look for a firm washer that sits flat inside the connector.
Hot water can soften weak seals, while cold water may make them stiff and brittle.
Avoid forcing mismatched threads. It may seem secure at first. However, damaged threads can leak slowly behind the sink.
A hand-tight connection followed by a gentle tool adjustment is usually safer than excessive force. Test the adapter with cold water, then warm water, while watching every joint for movement or moisture.
7 Tips for Choosing the Right Faucet Adapter
Choosing the correct faucet adapter starts with identifying the connection. Measure the faucet outlet, thread diameter, and pitch before buying. Tip one: match male and female threads. Tip two: check whether the outlet uses an aerator, diverter, compression fitting, or push-fit connection. Tip three: choose brass or certified engineering plastic for repeated use. Plastic can work, but it may cross-thread easily. Tip four: consider installation space. A short adapter suits a tight sink, while a swivel model improves hose movement.
Seals deserve more attention than appearance. Tip five: select an EPDM or silicone washer for potable-water applications. Inspect the sealing face for scratches, mold, or flattening. I once trusted a washer that looked acceptable; it began dripping overnight. Tip six: use PTFE tape only on compatible tapered threads. Do not wrap tape around compression threads, where the washer creates the seal. Hand-tighten first, then use an adjustable wrench carefully. Over-tightening can damage plastic threads or distort the gasket. Keep it simple.
Installation method affects both reliability and repair time. Tip seven: choose a tool-free adapter for temporary connections, but use a wrench-secured fitting for frequent operation. Keep an adjustable wrench, cloth, small brush, and replacement washers nearby. The Water Research Foundation’s Residential End Uses of Water, Version 2, measured faucet use at roughly 11% of indoor demand. EPA WaterSense states that efficient bathroom faucets use no more than 1.5 gallons per minute, compared with the older 2.2-gpm standard. A poor seal can waste that advantage. Test the joint for five minutes, then check again after the first use. My own weak point is rushing the final inspection.
| Tip | Adapter Type or Connection | Typical Installation Method | Recommended Seal | Required Tools | Best Use Case | Key Selection Check | Common Caution |
|---|---|---|---|---|---|---|---|
| 1 | Threaded faucet aerator adapter | Remove the existing aerator, clean the faucet outlet, then hand-start the adapter on the matching male or female thread. Tighten gently. | Flat rubber or silicone washer inside the adapter. Thread-sealing tape is usually unnecessary when the washer makes the seal. | Soft cloth and adjustable pliers, if needed. Use the cloth between the pliers and the finish. | Connecting a hose, filter, portable dishwasher line, or countertop appliance to a standard threaded outlet. | Match thread gender, outside diameter, and pitch. Common aerator thread sizes vary by faucet design, so measure or verify before buying. | Do not overtighten; excessive force can damage plated surfaces or deform the washer. |
| 2 | Slip-on or quick-connect adapter | Slide the adapter over the faucet outlet and secure it with the supplied clamp, compression ring, or locking mechanism. | Internal O-ring or compression gasket. Lubricate an O-ring lightly with clean, potable-water-safe silicone lubricant if the instructions allow it. | Screwdriver or hex key when a clamp or set screw is included; otherwise, hand installation is often sufficient. | Temporary connections and faucets without a removable threaded aerator. | Confirm the outlet diameter and available straight length. The adapter must sit fully over a smooth, undamaged section. | A loose fit can leak or detach under pressure. This style may not suit pull-out or pull-down spray heads. |
| 3 | Compression adapter | Insert the tube fully, slide the compression nut and ferrule into position, and tighten the nut onto the adapter body. | Compression ferrule or sleeve; do not add thread tape to the sealing surfaces of a compression joint. | Two adjustable wrenches; a tubing cutter may be needed for a clean, square tube end. | Rigid or semi-rigid supply tubing where a reliable mechanical connection is required. | Match the adapter to the exact tube outside diameter and material. Copper, plastic, and multilayer tubing may require different fittings. | Overtightening can crush soft tubing or distort the ferrule. Tighten according to the fitting instructions. |
| 4 | Push-fit tube adapter | Cut the tube square, remove burrs, mark the insertion depth, and push the tube fully into the fitting until it reaches the internal stop. | Internal O-ring and gripping collet supplied as part of the fitting; no thread sealant is used on the tube connection. | Tubing cutter, deburring tool, and a depth marker. A disconnect clip may be needed for removal. | Fast installation where soldering, threading, or access for two wrenches is difficult. | Verify that the fitting is approved for the tube material, size, water temperature, and intended pressure. | An angled or scratched tube end may prevent the O-ring from sealing. Cut off damaged sections before insertion. |
| 5 | Hose-tail or barb adapter | Push flexible tubing over the barbed section and position a clamp behind the last barb. | The tubing seals against the barbs. A stainless-steel clamp or suitable hose clamp provides retention; thread tape belongs only on threaded ends. | Hose cutter or utility knife, screwdriver or nut driver for the clamp, and pliers when needed. | Flexible hose connections for low-pressure drainage, filtration, or appliance applications when permitted by the equipment instructions. | Match the barb size to the tubing inner diameter and select tubing rated for potable water and the expected pressure. | Do not use an undersized or unapproved hose. A barb connection must be restrained securely against pull-off. |
| 6 | Threaded pipe adapter | Align the male and female threads by hand, turn several rotations without force, then tighten with a wrench while protecting the finish. | For tapered pipe threads, use thread-sealing tape or a compatible pipe-joint compound. Do not use sealant to compensate for mismatched threads. | Two adjustable wrenches, strap wrench, and scissors or a tape cutter. A basin wrench may help in confined spaces. | Permanent or semi-permanent transitions between a faucet connection and a threaded pipe, valve, or hose. | Distinguish tapered pipe threads from straight threads and confirm the nominal size and thread standard. | Cross-threading can permanently damage the fitting. Never force a connection that does not start smoothly by hand. |
| 7 | Swivel or universal adapter | Install the correct washer, align the swivel nut, and tighten the nut by hand before applying only light wrench force if specified. | Flat washer at the swivel face; an O-ring may seal the rotating section. Use only the seal supplied or specified for that adapter. | Adjustable wrench, soft cloth, and ruler or caliper for checking the outlet diameter. | Situations requiring improved alignment, reduced hose stress, or compatibility with more than one outlet configuration. | Check the adapter’s maximum pressure, swivel range, clearance, and whether the faucet outlet is rigid enough to support the added assembly. | A swivel joint should not be used to correct severe misalignment or carry excessive side load from a heavy hose. |
| Installation note: Shut off the water before installation, remove debris from mating surfaces, and open the faucet slowly after assembly. Inspect every connection for leaks under normal operating pressure. Always follow the adapter and faucet manufacturer’s published size, material, temperature, and pressure requirements. | |||||||
Choosing the right faucet adapter means weighing features, maintenance, and long-term value together. Start with thread size, outlet diameter, and faucet type. A small mismatch can cause leaks, even when the adapter feels secure. Check the material, sealing washer, flow-control insert, and tool-free installation. These details affect daily convenience and replacement costs.
Flow rate deserves careful attention. The U.S. EPA WaterSense Residential Faucet Specification reports a maximum flow of 1.5 gallons per minute, compared with the federal standard of 2.2 gallons. Lower flow may reduce water use, but weak pressure can frustrate kitchen tasks. Test the adapter with a full basin and running tap. Comfort matters too. I once focused too much on efficiency and underestimated splash behavior.
Maintenance needs are easy to overlook. Choose an adapter with removable screens and accessible seals. Rinse mineral deposits monthly in hard-water areas. Avoid aggressive cleaning chemicals, which can damage rubber components. The U.S. Geological Survey identifies hardness as a common cause of household scale buildup. Consider corrosion-resistant metal, spare washers, clear warranty terms, and local replacement availability. A cheaper adapter may cost more after repeated leaks. Its value should include installation time, water performance, cleaning effort, and expected service life. That calculation is imperfect, but it is more realistic than comparing purchase prices alone.